Wednesday, March 27, 2013

Penny Facials: The Baking Soda Facial

This post is part of my ongoing series Penny Facials:  Recipes For Your Face.  

Next up in my Penny Facials series is the Baking Soda Facial.  Of course, Pinterest is where I found this method and it proves once again that Pinterest has the answer to all of life's questions.  It's also a black-hole vortex were all time is lost but I just can't quit it.  

The Baking Soda Facial naturally exfoliates the skin as well as helps to restore the skin's natural pH balance.  In this particular recipe, we're only using water and baking soda so it's relatively harmless, though I would recommend testing a patch of skin first if you tend to have sensitive skin.  Different versions of this facial include acidic ingredients (like lemon or orange juice) but I'll cover that in another post.  

Similar to the Honey Aspirin facial, the Baking Soda facial really makes my skin glow.  I think of it almost like a skin polish.  It's gritty and scrubb-y but it leaves skin super smooth and glowing.  I generally do this once a week but I'd estimate that even 3-4 times a week would be ok, making sure to follow up the treatment with a moisturizer.  

Let's get started!

Baking Soda Facial


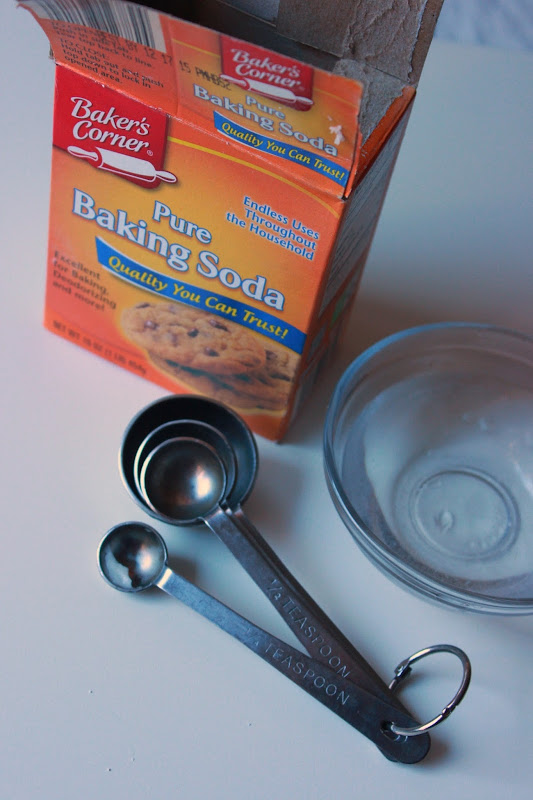
1.  Add 1 1/2 teaspoons of baking soda to a small bowl.  


2.  Add 1/2 teaspoon of water to the baking soda.  This should form a cohesive paste but if the mixture seems dry, add a pinch more water.  You're looking for a consistency that will easily stay on the skin, like a mask.


3.  Apply to the face, avoiding the eye area, working in small circular motions to scrub the face.  Allow to sit for 5-10 minutes.  The mixture will become dry after a few minutes and can easily flake off so try to avoid any exaggerated facial movements (<< not even sure what that would entail).  


4.  Rinse thoroughly with warm warm and moisturize.  

I obviously use this as a facial but you could easily adapt this as a full body scrub.  The above recipe is really only enough to cover the face but the ratio is 3 parts baking soda, 1 part water so adjust the quantities as necessary.  And being that a box of baking soda is 75 cents, it's super cost effective to do often.  

It's one of my faves and I hope you give it a go!           

Sunday, March 24, 2013

Rose Spritz Cookies with Marshmallow Buttercream Frosting


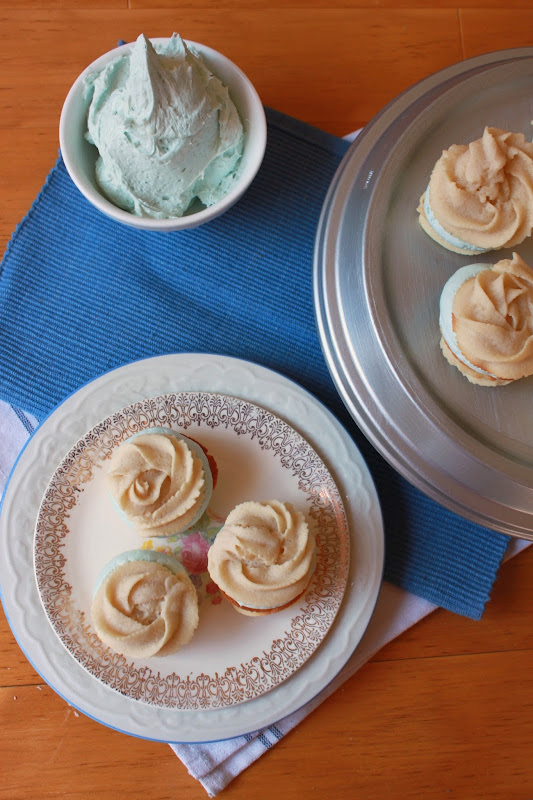
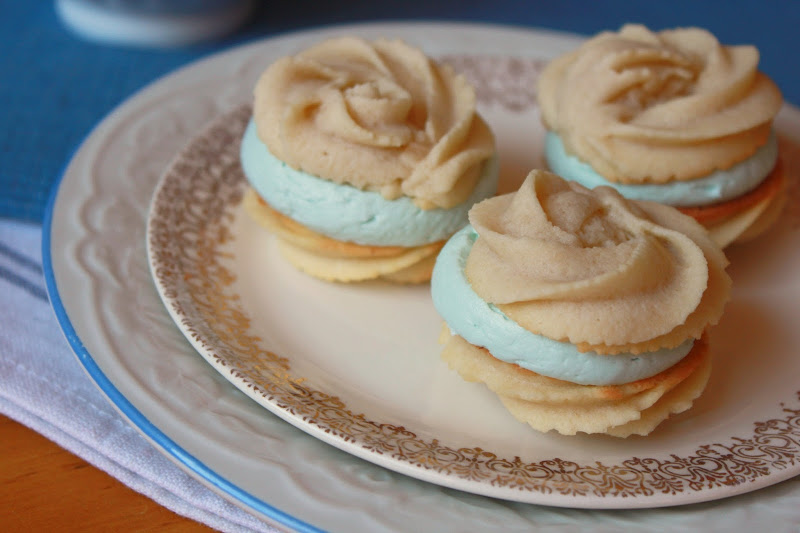
Look at these pretty little gems!  Visions of spring!  Treats like these are some of my favorite to make because they're so darn cute and impressive but also portable and bite size and, most importantly, delicious.  


This starts with a "spritz" cookie which I soon discovered is just a name for a delicious buttery cookie.  In fact, these cookies are completely delightful all on their own.  They actually remind me of those butter cookies that come in a blue box and have a hole through the middle.  I used to stick them on my fingers when I was younger/wouldstilldoitnow.  You did that too right? 


Of course any frosting will do but Marshmallow Fluff Frosting will probably make you the happiest.  Granted there's no shortage of butter or sugar compared to any other buttercream but Fluff Frosting has a certain lightness to it that lets you justify eating 3 (ok, probably 5) of these cookies.  


And don't be intimidated by the pretty piping!  If you can make a swirl, then you can make a rosette.  Real life.  And these little babies are so perfect for spring!  Like a bouquet of roses.  And it's probably ok to eat these by the dozen too.  

Here's the recipe!  

Rose Spritz Cookies with Marshmallow Buttercream

Ingredients:

Cookies
1 cup butter, room temperature
1/2 cup sugar
1 egg
1/2 teaspoon vanilla extract
1/2 teaspoon salt
2 1/4 cups all-purpose flour

Marshmallow Buttercream
1 cup butter, room temperature
4 cups powdered sugar, sifted
14 oz (2 jars) marshmallow creme or Fluff
food coloring, if desired

Directions:
1.  Heat oven to 400 degrees and line baking sheet with parchment or silicon mat and set aside.  

2.  Combine butter, sugar, egg and vanilla in the bowl of a stand mixer and beat ate medium speed until well combined and creamy.  Scrape bowl as necessary.  

3.  Add flour and salt and blend on low until just combined.  

4.  To make rosettes, fit a large piping bag with a Wilton 1M tip and fill bag with cookie dough.  I found it easiest to massage the piping bag with my hands to help warm the dough before piping.  To pipe, hold piping bag perpendicular to the baking sheet and pipe a swirl, beginning in the center and working counter clockwise.  Pipe cookies about an inch apart (they won't spread, so don't worry).  

5.  Bake 5-8 minutes until slightly golden.  Remove from baking sheet and allow to cool completely before filling with frosting.  

To make frosting:  
1.  Cream butter on medium-high speed with an electric mixer until butter is light and fluffy.  

2.  Begin adding powdered sugar, 1/2 cup at a time until fully incorporated.  

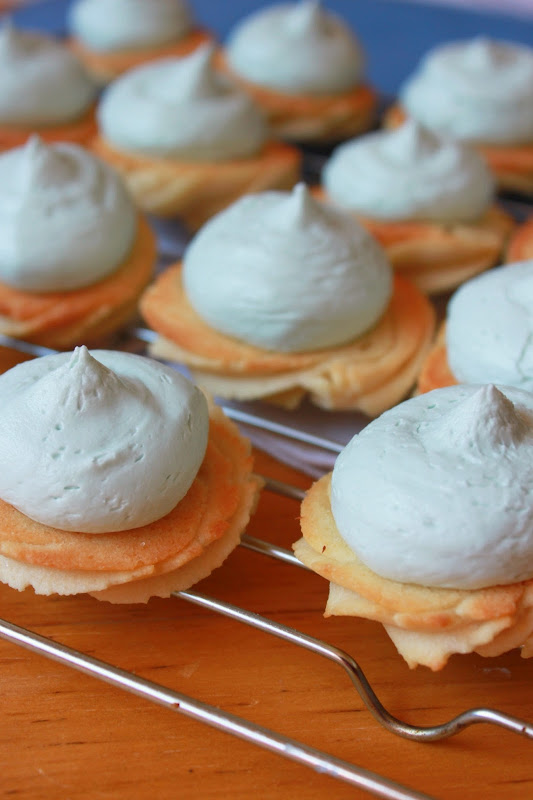
3.  Once combined, fold in marshmallow creme and tint with food color, if desired.  Pipe or dollop frosting onto one half of an upturned cookie and sandwich another cookie on top.  

Enjoy!  

Recipe from I am Baker


Wednesday, March 20, 2013

Penny Facials: Recipes for your face

I'm SO pleased to introduce the first of what I hope to be a series of posts called "Penny Facials: Recipes for your face."  

Being a Pinterest feind, I've come across quite a few at-home facial treatments and I've found a ton of really great ideas.  I basically give myself a facial every Sunday night (while watching Downton Abbey, obvi) and was excited to find a lot of "recipes" using ingredients I had around the house.  

I call these Penny Facials because they're insanely cheap.  Like, probably a penny.  I usually have all the components on hand and they actually work!  I see actual results from these facials and it just goes to show that it doesn't need to cost a fortune to look fabulous.  

Let's get started!  First up:  

The Aspirin Facial:  


So here's the idea behind the Aspirin Facial.  Aspirin contains salicylic acid (which is a beta hydroxy acid) and it's used to fight acne and blemishes.  Even at 28, I STILL get breakouts all too often so this is a great facial for me.  

Uncoated aspirin easily and quickly dissolves in water and honey acts as glue to keep the facial on your skin and it acts as a natural moisturizer.  This facial always makes my skin look like it's glowing!  Whenever my skin seems a bit dull and blah, I do this facial as a pick-me-up.    

Step 1:  Place 2-3 uncoated aspirin in a small bowl or the palm of your hand  

Step 2: Dabble your fingers in water and allow about 2-3 drops to roll onto your aspirin.  A little goes a long way here.  You don't want to water down the aspirin too much or you'll have trouble forming a paste.  You really only need just a few drops to help the aspirin begin dissolving.  


Step 3:  After about 10 seconds, you should be able to mash the aspirin into a dust/paste.  If it hasn't dissolved, add just another one or two drops of water to help it along.


Step 4:  Drizzle a little honey (I'd estimate 1/4- 1/2 teaspoon) onto the paste and mix to incorporate.     


Step 5:  You should have a cohesive paste now.  Using your fingers, spread the paste on your face, avoiding the eye area, and gently massage as you apply.  Allow to sit for 10-15 minutes and then rinse thoroughly with warm water.  


I generally do this facial 1-2 times a week but you could easily do it every other day.  It's never caused me any irritation but you may want to test a small patch of skin first to be sure it doesn't bother your skin.  

So give it a shot and let me know your thoughts!    

Thursday, March 14, 2013

Irish Soda Bread


So I'm not sure if I'm actually Irish.  I mean, it's not something I identify with but when I spent some time REALLY digging into my genealogy, I discovered I had some ancestors that came to America via Ireland.  So were they Irish?  Or did they just travel from Ireland on their way to America?  These are the great mysteries on life.   


To me, St. Patrick's Day always seemed like a day where people celebrated something I wasn't in on.  The only day Polish people have is Pulaski Day and it's hardly known for it's food or drinking.  So the extent of my celebrating St. Patrick's day was occasionally eating corn beef and potatoes if my mom made it.   

It may not be a surprise then that this was my first time trying Irish Soda Bread.  Mostly, it never really appealed to me because it looked a little blah.  But leave it to America's Test Kitchen to get me interested.  
This bread has a wonderful chew and tang and of course, look at that crust.  It's crunchy and craggly and it's just got character, man.  I think it's best eaten the same day it's made and slathered with warm butter.  Or jam.  Or both.  It's quick to whip up so add it to your St. Patty's feast!  Celebrate your Irish Heritage!  Or in my case, my kinda sorta "wait, am I?" Irish heritage.  

Here's the recipe!  

Irish Soda Bread

Ingredients
3 cups all purpose flour
1 cup cake flour
1 1/2 teaspoons baking soda
1 1/2 teaspoons cream of tartar
1 1/2 teaspoons salt
2 tablespoons sugar
2 tablespoons unsalted butter, softened
1 1/2 cups buttermilk
1 tablespoon melted butter

Directions: 
1.  Preheat the oven to 400 degrees and spray a baking sheet with non-stick spray.  Set aside.  

2.  Place the flours, baking soda, cream of tartar, salt and sugar in a bowl and whisk to combine.  Add the softened butter and, using your fingers, rub it into the dry ingredients until the butter is incorporated and the mixture resembles course crumbs.  

3.  Make a well in the center and pour in the buttermilk.  Using a fork, work the liquid into the dry ingredients until the mixture comes together in large clumps.  

4.  Turn onto a floured work surface and knead briefly until any dry flour becomes just moistened.  The dough will be scrappy and uneven.  

5.  Form the dough into a round, about 6-7 inches in diameter and place on baking sheet.  Score a deep cross in the center of the dough and place in the oven.  Bake for 40-45 minutes until nicely browned and toothpick inserted in the center comes out clean.  Remove from oven and brush with melted butter. Allow to cool for at least 30 minutes before slicing.  

Enjoy!  

Recipe from America's Test Kitchen.  

Wednesday, March 6, 2013

Toasted Coconut Muesli


Would it be too much to say that this muesli changed my life? It feels like it would be too much. I don't care, I'll say it anyway. It changed my life!  


Growing up and to this day, I've always been a breakfast person. Just think about it- breakfast includes food for just about any palette. There's bacon and sausage for meat-eaters, there's fruit salad or oatmeal for light-eaters, there's pancakes and waffles for the people with hangovers. Breakfast has it all!


I'm baffled when people say they never eat breakfast. How is that possible?! My stomach is growling 30 minutes after waking up! 

When I was young, going to Old Country Buffet every Sunday for breakfast was one of my favorite parts of the week.  Which I now realize is a sad sad existence for a 9 year old but the idea that I could pick and choose my own breakfast items was pure heaven.  So once I grew up and got a 9-5 job, breakfast was mostly an afterthought 5 days a week.  I don't have time to eat at home before work so I'm left eating whatever is the quickest and most convenient at my desk.  Needless to say, I never want to see a packet of instant oatmeal again.  
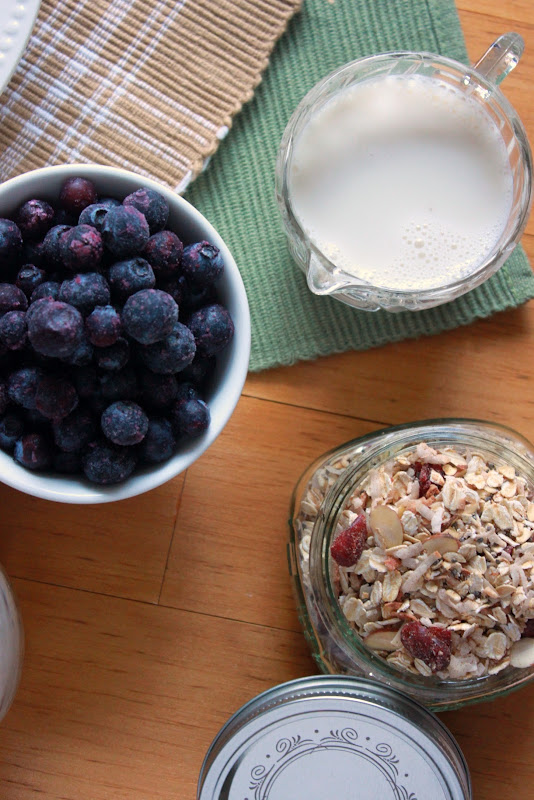
BUT, like a beacon of light from the heavens, Joy the Baker posted a recipe for toasted coconut muesli.  And then I just died.  Muesli is the answer.  It's chocked full of good stuff and whatever the heck you wanna chock it full of, it's soaked overnight (in your choice of almond milk, soy milk, milk milk, etc.) and topped with frozen berries of your choice.  It retains some crunch from the almonds and bursts of sweetness from the berries.  It's satisfyingly cold and delicious and filling.  Did I mention I love it?  It's made for breakfast lovers.   

Here's the recipe!  

Toasted Coconut Muesli
yields: apprx 10 servings

Ingredients
4 cups old-fashioned oats
1 cup sweetened coconut
1 cup sliced almonds
1 cup dried cranberries (or any dried fruit you like)
1/4 cup chia seeds
1/2 teaspoon ground cinnamon
1/2 teaspoon freshly grated nutmeg
1/4 teaspoon salt

To serve:
frozen blueberries
cold milk

Instructions:
1.  Preheat oven to 350 degrees.  Place oats on an ungreased and unlined baking sheet.  Place coconut on a second ungreased and unlined baking sheet.  Toast oats and coconut until coconut is golden brown and fragrant, about 5 to 7 minutes.  Coconut browns quickly, keep an eye on it and stir frequently.  Remove both the oats and coconut from the oven and allow to cool.
2.  In a large bowl toss together oats, coconut, dried cranberries, chia seeds, spices and salt.  Mix to combine.  Store in an airtight container or bag.  
3.  To serve: Prepare muesli the night before (or at least a few hours before) you’d like to serve it.  To serve, scoop desired amount (I use 1/2 cup) of muesli into a bowl.  Top with a handful of frozen blueberries (I use 1/4 cup).  Pour almond milk over the muesli and blueberries just to cover the blueberries.  Cover and place in the fridge overnight, or for at least 2 hours.  When ready, stir well and eat!
Recipe barely adapted from Joy the Baker.

Monday, March 4, 2013

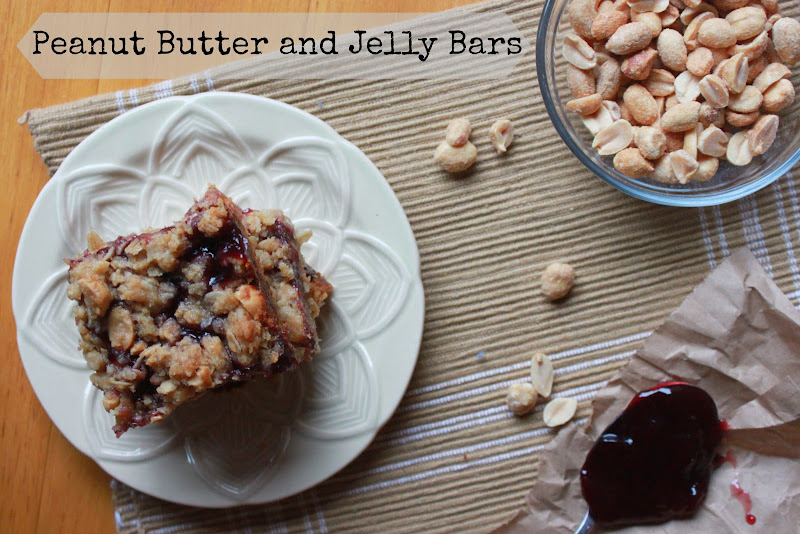
Peanut Butter and Jelly Bars


Have you noticed my obsession with bar desserts?  I can't help myself.  They're easy to throw together, delicious (duh), and they feed a crowd!  It's my go-to dessert when I'm feeling lazy but still wanna bake but don't wanna try very hard.  On a day like that it's not like I'm gonna try tackling homemade croissants.  I need something with one or two bowls, stick it in a pan, bake it and eat it.  

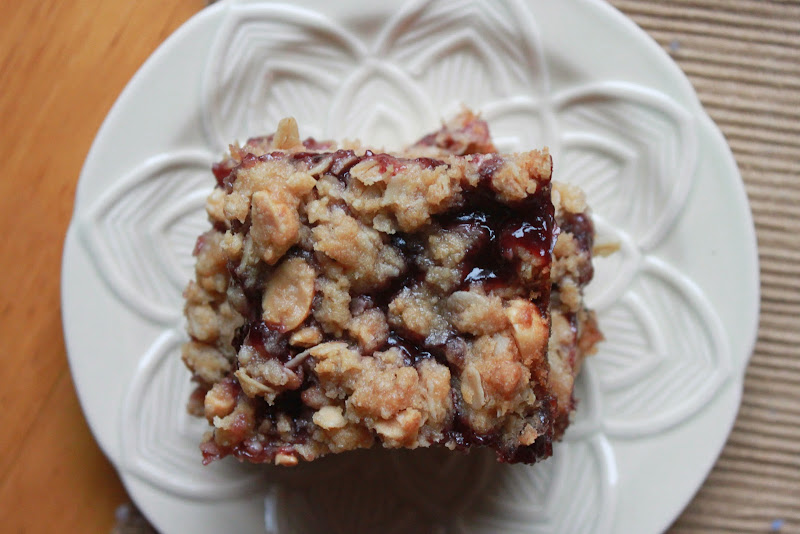
And these may be my best adaptation yet.  I will never not love Peanut Butter and Jelly.  Not only is it just delightful comfort food reminding me of being a kid, but it's just plain delicious.  In terms of flavor combinations, Peanut Butter and Jelly is right up there with Peanut Butter and Chocolate or Peanut Butter and Bacon or Peanut Butter and Fluff.  I've got a thing for peanut butter.
  
These were a huge hit with my coworkers too.  Everybody loved 'em.  I was basically famous for a day.  (<< not even a little bit true).  


But I think the key is, you've really gotta use grape jelly.  I know it's compelling to use strawberry or blackberry or something but you'll do yourself a disservice.  These bars need good ol' fashioned grape jelly.  The masses will thank you.  


Here's the recipe!

Peanut Butter and Jelly Barsyields: 12-16 bars

Ingredients:
Crust:
1 3/4 cups all-purpose flour
1 packed cup light brown sugar
1/2 cup creamy peanut butter
3/4 salt
3/4 teaspoon baking soda
1 3/4 cups old-fashioned oats
1 cup chopped peanuts (I used salted dry roasted)
1 cup (2 sticks) unsalted butter, melted
1 egg
1 teaspoon vanilla extract

Filling:
1 1/4 cups grape jelly
1 Tbsp water (if needed)

Instructions:

1. Preheat the oven to 350 degrees F. Spray a 9 by 13 by 2-inch pan with cooking spray, set aside.

2. If your jelly needs help loosening up a bit, combine with water in a small bowl and set aside. You can also make the peanut butter easier to work with by mixing it into your melted peanut butter in the microwave or on the stovetop.

3. In a large bowl, whisk together the flour, sugar,salt and baking soda. Stir in the oats and peanuts to combine. Add the butter, peanut butter, egg and vanilla and stir until all dry ingredients are moistened.

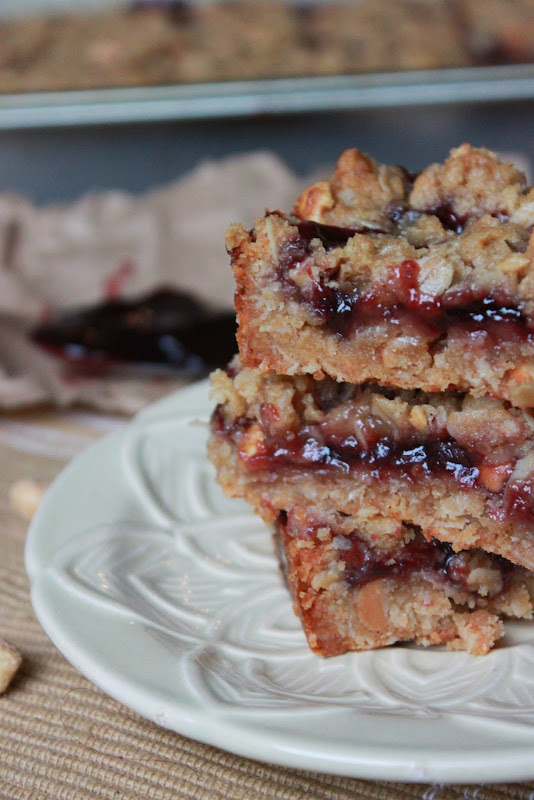
4. Lightly press half of the crust mixture onto the bottom of the prepared pan to make an even layer. Using a spatula, spread the jelly over the crust. Cover the filling with the remaining crust mixture and gently press to flatten. Bake 30 to 35 minutes until golden brown. Allow to cool completely before cutting into bars.
Enjoy!
Recipe adapted from Giada DeLaurentiis

Sunday, March 3, 2013

Annie's City Livin'

So sometimes I think about things outside of my kitchen.  Weird, I know.  And what I love most about a lot of my favorite bloggers is learning a little about what they love to do/see/read outside of their own kitchen.  So here's some stuff:   


1.  Making it's way around the internet is Jennifer Lawrence's interaction with Jack Nicholson at the Oscar's and it's completely hilarious.  She's always got a quick wit and has no shame in laughing at herself.  Even when Jack Nicholson is being a bit of a creep.  http://www.youtube.com/watch?v=Upw1w2yXZs0


2.  So occasionally I go through phases where I actually just want myself to shutup.  It's not that I dislike the sound of my voice, it's that I actually can't stand most of the words coming out of my own mouth.  Does this happen to anyone else?  Like, you're sick of the old familiar phrases you always say and the way you say them.  Anyone?


3.  Not even a little bit embarrassed to admit that I've begun watching Vampire Diaries on Netflix and there is no turning back.  I'm not above tween lit, television and movies so obviously I read/watched all Twilight installments.  Well, clearly Vampire Diaries is right up my alley but I swear it's more mature!  I  mean, the characters are still in high school and all but there's something slightly less insufferable about the show than Twilight.  And let's face it, there's no Kristen Stewart which is an immediate plus.


4.  In a perhaps surprising admission given my Vampire Diaries viewing, I also feed my brain with things of greater substance and one of favorites ways to pass the time on the CTA (aside from reading Games of Thrones, duh) is to listen to This American Life.  I find every episode interesting but their recent two part series on Harper High School was completely fascinating and heartbreaking.  Being that I live in Chicago, it's sad and devastating that these stories happen so close to home but still feel so distant to me.  At several points during the second episode I even teared up (on the CTA no less) and I'm usually a stone-hearted monster.  I urge you to listen.  


5.  My friend sent me this link from Thought Catalog and it's basically like I wrote it myself.  They're all so sadly true.  I think I went from 21 years old to 65 years old in a matter of a few months.  I just wanna stay home and knit.  

6.  I knit now!  Don't be impressed though.  I barely knit.  I use a loom actually (which is marketed as a great tool for the elderly or children) so I'm sorta cheating.  But regardless, it's relaxing and it keeps my hands busy so I don't eat pounds and pounds of Goldfish crackers.  Which I can easily and happily do.  

So what's new in your 'hood?